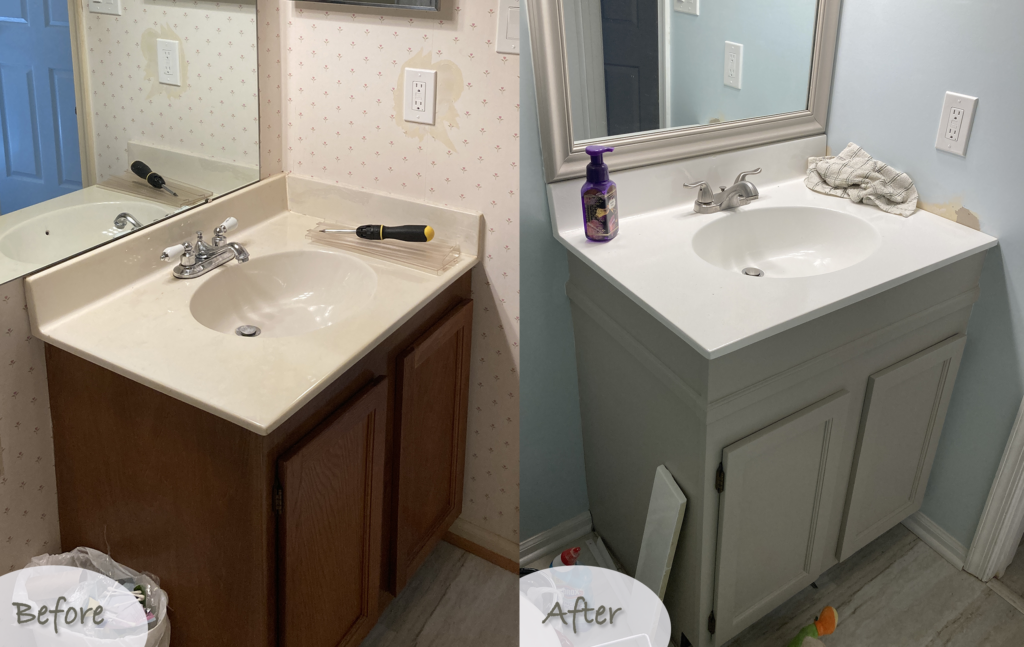
The condo I recently bought in Maryland came with 1980s original 30″ tall vanities. It wasn’t something I noticed before I purchased it, but when I started using the sink to brush my teeth I realized that I really had to bend down quite a bit. Were people shorter back in the 80s?? Actually, maybe! ?
So I knew I wanted a taller vanity. I could have just swapped it out for a new one like most normal people, but I appreciated the fact that it was high-quality wood and still in great shape, so I wasn’t keen on letting it go to waste. Instead I did some research and learned that it’s not difficult to add height to an existing vanity! And I only spent around $30 on the materials this (plus the tools that I didn’t have yet).
I won’t give a full tutorial here, since others have already done a great job at that! As my primary guide, I used this post from Remodelaholic. I also referred to this post from Noting Grace. Between those you should have all the information you need if you are looking to tackle this project, but I wanted to also share my experience and some additional tips!
There’s more than one way to make a bathroom vanity taller, but I chose to add additional wood framing to the top, under the sink / counter. I found that once I had purchased all the tools and materials I needed, and learned how to drill pocket holes (these allow you to make hidden and very strong joints in the wood), the process was really simple and didn’t take long at all!
Here are the tools and materials I used:
- 1×6″ wood to go around the entire perimeter of the vanity. I used 1″ since that was the thickness of my existing vanity. The length ended up being ~9′ for mine and cost ~$15 (I got poplar wood)
- Kreg R3 system with clamp for drilling pocket holes, $50. I could have just as well opted for the single barrel Kreg jig and saved some money, but thought I might appreciate the double barrel system for future projects, and the clamp is key!
- Pocket hole screws, $5. I used fine threaded for screwing into the vanity since it’s a hardwood, and I also used the coarse threaded screws that came with the Kreg jig for joining the poplar together at the corners.
- Trim molding to cover the seam, I spent ~$10 on this at Home Depot
- Drain pipe extension, $4
On to pictures of the project! First, I removed the counter. This took just a little elbow grease to free it from the glue on the corners, but wasn’t too difficult with the help of a pry bar.

Here’s a photo taken while waiting for my boards to get cut at Home Depot with my trusty side kick and service-dog-in-training, Rustin! He was a very good boy even with all the loud noises from the saw. I don’t have a power saw myself (yet), so I usually get help cutting at Home Depot. They do a pretty good job but aren’t always 100% accurate, so I had to sand down the edges on a few pieces.

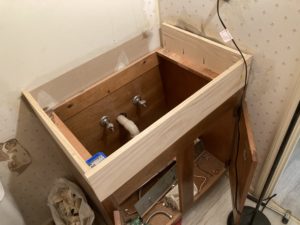
Next, I joined the pieces of the frame together with pocket holes using the Kreg jig and clamp. Then, I attached the whole assembly to the vanity. I initially planned to use a 1×2″ brace attached to studs in the wall for the back piece, but ended up changing course since I realized there was only one stud in the wall across the relevant stretch, and also the vanity stood away from the wall just a little bit, so I decided it felt sturdier to simply add another 1×6″ to the back, which I did after the below photo was taken. It would probably be best to use the wall brace if your situation allows it though, and you could save a few bucks by using a smaller piece that way.
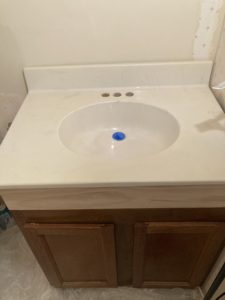
Here it is with the counter back on! I had to install a drain pipe extension to account for the extra height to the sink, which was pretty straightforward with the help of this video.
Finally, I added trim molding around the edges to cover the seam and painted! The corner where the front face of the cabinet extends a few millimeters beyond the side was a bit tricky with the trim. I used a combination of mitered cuts, sanding down, and caulk to get the trim to go around this corner in a nice (I think) way.

And that’s it! The vanity felt super tall to me at first, but of course it’s a big difference from what it was. I think I would have been happy with raising it only 4 inches, but this will work just fine and allows a little bit more space inside.
After raising the vanity, I resurfaced the counter / sink – you can learn more about that process on this post. And stay tuned for more on the full bathroom renovation!
Pingback: Home Improvement Solutions: Resurfacing an Old Sink | We buy houses in Brenham | Local, easy, sell your house fast