
As part of renovating the bathrooms in my condo in Maryland, I had to remove some very old wallpaper (must have been original from the ‘80s). I wanted to write a quick post to share my experience, since this can be a tricky task that many people will tackle at some point, and I ran into some surprises along the way!
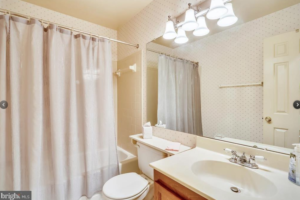

I have two bathrooms, and decided to start with the master bath first (originally photo above on the right). In spite of being able to tell that the wallpaper was very old and seemed VERY well bonded to the wall, I started out optimistic that there had to be some clever trick or solution that would make the task easy. Unfortunately, that didn’t turn out to be the case :-p Here I the things I tried that did not work for me:
- Peeling off the top print layer first, as in this video on wallpaper removal. I guess this wallpaper either just never had a separable outer print layer, or it was old enough that it could no longer be peeled off. There were places where I could pull off tiny pieces (i.e., smaller than say the size of a penny), but it was not going to be a feasible way to do the whole thing.
- Using a wallpaper scoring tool then applying any sort of suggested solution, letting it soak in, then scraping it off. We tried warm water, fabric softener (which lots of people recommended), and a few other things with no success. No matter what we put on it, the wallpaper could not be scraped off. In some places, we even ended up doing more harm than good and accidentally peeling off the outer layer of drywall underneath the wallpaper (see photo)
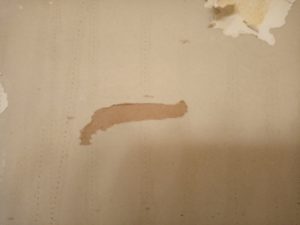
It was a total mess!

So, I finally decided that I was going to just paint over it, and found plenty of testimonials of people who had found that going that route worked well for them. I decided to primarily follow the steps for painting over wallpaper outlined here. The exact steps I used were:
- Wash the wall with a solution of 1/2c trisodium phosphate & 1 gallon of water (TSP is super cheap at Home Depot), and let dry overnight
- Peel off all loose bits of wallpaper (from our many previous failed attempts) with a putty knife
- Repair the peeled drywall. I referred to this video and this video for how to do this. Note that in the first video, a shellac-based sealing product is recommended, but I read elsewhere that this might not be appropriate for bathrooms, and something like so Rx35 or Gardz would be better. I decided to go with Gardz.
- Sand wallpaper seams with 150 grit paper (so that you wont see lines under the paint).
- Mud over seams and repaired drywall with mud knife.
- Sand mud with 150 grit paper (this site also recommends sanding everything with 120-150 grit, enough to dull the finish but not tear the paper)
- Prime. I read that Gardz or Rx35 should work for this too, or Killz kitchen and bath, or an oil-based primer. I decided to use Gardz since I had it for repairing the drywall.
- Paint
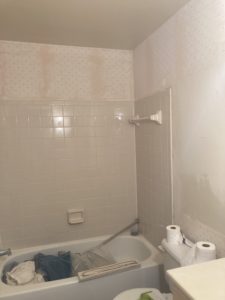
Here’s what the second bathroom looked like after Step #4:
Step #7 was where this really got FUN (yes, that’s sarcasm). After I had completely given up on peeling off the wallpaper and done ALL the prep-work to paint over it (steps 1-6) in BOTH bathrooms (because once you’ve got a system going, why not tackle everything?), it just so happened to turn out that when I applied the Gardz to the wallpaper as a primer/sealer, the wallpaper started to peel off! It seems like the fact that I had sanded the paper down a little bit before applying the Gardz may have helped it to penetrate and dissolve the glue a bit, but I think that the main factor was simply that the composition of this product was just somehow better at loosening up the paper so it could be peeled off (go figure!). It still took a LOT of elbow grease, but now we actually were able to get the wallpaper off, so we pivoted back to that strategy and removed every last bit!
But there was yet another FUN surprise! As it turns out, the paper in our second bathroom was extremely easy to peel off! Since the material didn’t seem different in any way from the master bath, we had just assumed the removal process would be the same. We could have saved ourselves a TON of time and effort if we had just attempted to moisten the wall and peel that paper off (rather than going through the process of prepping to paint it), as that’s what we were ultimately able to do – it came off in huge sheets and took no more than half an hour for the whole bathroom (I don’t want to think about how long the master bath took). So many lessons learned!
I’d love to hear about other people’s adventures in wallpaper removal in the comments below! I’m sure that someone with the right experience would have had a better idea of how to tackle my bathrooms, and I hope that sharing my experience will help someone else looking to take on this project!
All done!
