
I wanted to share my experience with using molding to create faux wainscoting – this was a pretty simple project which really elevated the look of my dining area!
I knew I wanted a white wainscoting look in my dining area, and originally thought about buying some full-blown wainscot panels, like these at Lowe’s. I came to realize, however, that installing full paneling would present some challenges – going around electric outlets, making the seams come together well, and getting the spacing of the fixed panels on variable length walls to come out right would all be quite difficult or even impossible to do in a way that looks really good.
So, I settled on the “faux” wainscoting solution that I have seen done with strips of molding. For the most part I followed the procedure on this blog post by Frills and Drills.
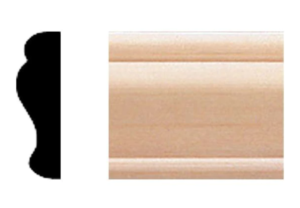
I used this molding from Home Depot , since I liked the size and profile. It was $7 for an 8 foot long piece – I used 8 pieces for a total cost of $56. I think this is just a little bit less than what I would have paid for full wainscot paneling, but not by a whole lot.
To calculate the size of the boxes that would work best in my space, I used a spreadsheet with formulas so I could play around with the number and widths of the boxes and see how that would affect the spacing and amount of moulding needed.
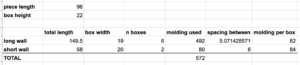
I ended up using boxes that were 22″ high, and 19″ wide on my long wall but 20″ wide on my short wall. This left a spacing between them of ~5″ on the long wall and 6″ on the short wall. I’m happy with how it came out using these dimensions – it’s not glaringly obvious that the widths and spacing are different, and looks well-balanced.
I cut the molding with a simple miter box since I don’t own any power saws. Since it was a LOT of cuts, I actually ended up using the miter box to get the cut started (I guess you could say “score” it) and then finishing the bulk of it with my oscillating tool. This worked really well and saved me lots of time and energy!
To secure the molding to the wall, I used a combination of glue (all purpose Loctite) and finishing nails. The glue made it easy to get the pieces into position, and then I added the nails to secure even further.
I would love to hear about anyone else’s experiences with faux wainscoting, and would be happy to answer questions from anyone looking to do it themselves!